【CentOS 6】透過 SCL 將 Apache(httpd) 升級到 2.4 版

參考資料 —-
軟件選集(SCL)軟件庫
義守大學檔案伺服器
Using Apache httpd 2.4 on Red Hat Enterprise Linux 6

RHEL/CentOS 的慣例是主版本發行後,接下來就進入維護狀態,只做 bug fix / 次版本 的更新。

例如:
CentOS 6.x 的 Apache 是 2.2 版,即使現在最新的 CentOS 6.7,Apache 是 2.2.15-47。

但 Apache 2.2 被發現有安全性漏洞(CVE-2012-0053),必須要升級到 2.2.22 以上的版本,這怎麼辦呢? 尤其對企業而言,不可能任意地就將主機 從 CentOS 6.x 升級到 CentOS 7.x。

所幸 CentOS 推出了 SCL (RHEL 則為 RHSCL) 彌補了上述的缺憾。

centos-release-scl 歸類在 extras section,所以如果原本您有將

[extras]
enabled=0

則需

[extras]
enabled=1

[root]# yum  install  centos-release-scl

yum 會連帶安裝 centos-release-scl-rh

為了跟正式版本區隔,Apache 2.4 的程式名稱為 httpd24

[root]# yum  install  httpd24

您也可以上義守大學 FTP server 看看有哪些新版本的套件。

安裝完成後,要啟動 httpd24 的指令為

[root]# service  httpd24-httpd  start

設為開機啟動

[root]# chkconfig  httpd24-httpd  on

大多數人都會 Apache 搭配 PHP 使用,因為 CentOS 6 內建的 PHP 相依於 Apache 2.2,所以您移除 httpd2.2 時會一併移除 PHP。

要改用 Apache 2.4,則要搭配 PHP 5.5

[root]# yum  install  php55

注意 Apache 2.4 的 config 設定檔在 /opt/rh/httpd24/root/etc/httpd/conf/

在 Mac OS 上编译 FFmpeg

Source: http://www.samirchen.com/complie-ffmpeg-on-mac-os/


安装 Xcode 和 Command Line Tools

从 App Store 上安装 Xcode,并确保在 Xcode 的 Preferences -> Downloads -> Components 下安装好 Command Line Tools。

当然你也可以从 https://developer.apple.com/ 下载 Xcode 和 Command Line Tools。

安装 brew

Homebrew 是 Mac 上的一个很好用的包管理工具,安装方法即允许下列命令:

$ ruby -e "$(curl -fsSL https://raw.githubusercontent.com/Homebrew/install/master/install)"

使用 brew 安装依赖库

$ brew install automake fdk-aac git libtool libvorbis libvpx opus sdl shtool yasm texi2html theora wget x264 xvid lame libass

在安装这些库时,如果发生错误,可以重试一下,有时候可能是由于网络原因导致下载未完成而引起安装失败。你可以这样来单独安装一个库:

// Install x264 with brew.
$ brew install x264

如果有的库始终安装不成功,那么你可以尝试先升级更新下 brew:

brew update

悲剧的是,有时候执行 brew update 后,brew 可能都报错了,原因大多是本地的 brew 仓库(通常在 /usr/local/ 目录下)发生了冲突,这时候需要执行下 git 命令处理下冲突再更新 brew,命令如下:

$ cd $(brew --prefix)
$ git reset --hard HEAD
$ brew update

如果你还遇到其他问题,就先 Google 一下来解决吧。

编译 FFmpeg

接着就是用下列命令下载 FFmpeg 源码和编译它:

// 下载 FFmpeg 源码:
$ git clone http://source.ffmpeg.org/git/ffmpeg.git ffmpeg
// 编译:
$ cd ffmpeg
$ ./configure  --prefix=/usr/local --enable-gpl --enable-nonfree --enable-libass \
--enable-libfdk-aac --enable-libfreetype --enable-libmp3lame --enable-libopus \
--enable-libtheora --enable-libvorbis --enable-libvpx --enable-libx264 --enable-libxvid --extra-ldflags=-L/usr/local/lib
$ make && make install

当你 config 的时候有时候会报错找不到一些库,这时候你可以添加 --extra-ldflags=-L/usr/local/lib 试试。

测试一下

编译完成不报错的话,接下来你就可以试试拿一个视频来播着试试了,在 FFmpeg 目录下执行下面的命令让 FFmpeg 播放一个视频:

$ ffplay http://devimages.apple.com.edgekey.net/streaming/examples/bipbop_16x9/gear5/prog_index.m3u8

其他

如果你想要编译 FFmpeg 来适用于 iOS 项目,你可以看一下 FFmpegCompileTool

作者:SamirChen
链接:https://www.jianshu.com/p/aa6e5313c7e9
來源:简书
著作权归作者所有。商业转载请联系作者获得授权,非商业转载请注明出处。

phpMyadmin最大執行時間修改

Maximum execution time of 30 seconds exceeded phpmyadmin


今天在執行添加數據庫表格內容的時候,發現一隻出現這個問題


首先想到的是的就是要把php.ini中的 max_execution_time = 30 加大


可是不管我怎麼加大(>9000)或者設定成不限時間(0),還是都會有同樣的問題


這事情實在是用phpmyadmin dump/load出來的


用mysql source的方式又會有亂碼啊問題(可以在開頭加入SET NAMES ‘utf8′)


現在轉為懷疑會不會是phpmyadmin本身設置參數問題


所以就去查看config文件,果然,是phpmyadmin設置上有誤


以下是我修改的部份:


1. php.ini


代碼:


max_execution_time = 30 ; 建議增大或為0(不限制)


2. phpMyAdmin/config.inc.php 或者 phpMyAdmin/libraries/config.default.php


代碼:


$cfg[‘ExecTimeLimit’] = 300; 建議調整

yum安裝php錯誤缺少libmcrypt.so.4

[root@localhost ~]# yum install php56w-mcrypt

Loaded plugins: fastestmirror, replace, security

Setting up Install Process

Loading mirror speeds from cached hostfile

* base: ftp.tc.edu.tw

* extras: ftp.tc.edu.tw

* updates: ftp.tc.edu.tw

* webtatic: sp.repo.webtatic.com

Resolving Dependencies

–> Running transaction check

—> Package php56w-mcrypt.x86_64 0:5.6.32-1.w6 will be installed

–> Processing Dependency: libmcrypt.so.4()(64bit) for package: php56w-mcrypt-5.6.32-1.w6.x86_64

–> Finished Dependency Resolution

Error: Package: php56w-mcrypt-5.6.32-1.w6.x86_64 (webtatic)

           Requires: libmcrypt.so.4()(64bit)

You could try using –skip-broken to work around the problem

You could try running: rpm -Va –nofiles –nodigest


Resolve :


#rpm -Uvh https://dl.fedoraproject.org/pub/epel/epel-release-latest-6.noarch.rpm

#rpm -Uvh https://mirror.webtatic.com/yum/el6/latest.rpm

#yum clean


#yum install php56w-mcrypt


Dependencies Resolved

===================================================================================================================

Package                       Arch                   Version                       Repository                Size

===================================================================================================================

Installing:

php56w-mcrypt                 x86_64                 5.6.32-1.w6                   webtatic                  26 k

Installing for dependencies:

libmcrypt                     x86_64                 2.5.8-9.el6                   epel                      96 k

Transaction Summary

===================================================================================================================

Install       2 Package(s)


Installed:

  php56w-mcrypt.x86_64 0:5.6.32-1.w6                                                                               

Dependency Installed:

  libmcrypt.x86_64 0:2.5.8-9.el6 

利用纯真IP库建立mysql ip数据库

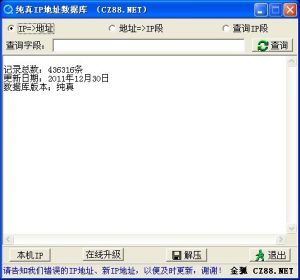
首先到http://www.cz88.net/ 下载一个最新的ip库,安装ip库后会生成一个快捷方式,如下图所示:

点击打开后,出现下图界面:

点击解压,会生成一个20多兆的文本文件,打开或者下载一个UltraEdit打开,另存为utf-8的文本文档,这样可以防止出现乱码。在此之前我们要修改一下php.ini的配置,不然中途可能会出现一些错误
默认情况下:MySQL导入文件大小有限制的,最大为2M,所以当文件很大时候,直接无法导入,下面就这个问题的解决列举如下:
在php.ini中修改相关参数:
影响MySQL导入文件大小的参数有三个:
memory_limit=128M,upload_max_filesize=2M,post_max_size=8M
我比较懒,直接将这三个都改成了128。
首先创建数据库

  1. CREATE TABLE ip_data (
  2. ipstart INT UNSIGNED NOT NULL,
  3. ipend INT UNSIGNED NOT NULL,
  4. region VARCHAR(50) NOT NULL,
  5. address VARCHAR(100) NOT NULL,
  6. PRIMARY KEY (ipstart, ipend)
  7. ) TYPE = MyISAM;

首先在PhpMyAdmin里手动建一个名称为ip_data的数据库,然后插入上面的sql语句,一个名称为ip_data的表单就可以建好了
接着将下面的代码

  1. <?php
  2. function EncodeIp($strDotquadIp) { // 把点格式的ip地址转换成整数表示的ip地址
  3. $arrIpSep = explode(‘.’, $strDotquadIp);
  4. if (count($arrIpSep) != 4) return 0;
  5. $intIp = 0;
  6. foreach ($arrIpSep as $k => $v) $intIp += (int)$v * pow(256, 3 $k);
  7. return $intIp;
  8. }
  9. $arrLines = file(“ip”.“.txt”);
  10. $intLen = 0;
  11. $i = 1;
  12. $resFile = fopen(“ip”.$i.“.sql”, “w”);
  13. foreach ($arrLines as $k => $strLine) {
  14. $arrElements = explode(“||”, addslashes($strLine));
  15. $intIpStart = EncodeIp($arrElements[0]);
  16. $intIpEnd = EncodeIp($arrElements[1]);
  17. $j = 3;
  18. $strAddress = “”;
  19. while ($arrElements[$j]) {
  20. $strAddress .= ” “.$arrElements[$j];
  21. $j++;
  22. }
  23. $strSql = “INSERT INTO ip_data (ipstart, ipend, region, address) VALUES (“.$intIpStart.“, “.$intIpEnd.“, ‘”.trim($arrElements[2]).“‘, ‘”.trim($strAddress).“‘);\r\n”;
  24. fwrite($resFile, $strSql);
  25. $intLen += strlen($strSql);
  26. if ($intLen > 2097152) { // 当正在写入的sql文件超过2M时结束当前文件而开始写入新的sql文件
  27. fclose($resFile);
  28. $resFile = fopen(“ip”.(++$i).“.sql”, “w”);
  29. $intLen = 0;
  30. }
  31. }
  32. ?>

将代码另存为php格式文件,然后放在www文件中,运行,就可以得到27个sql文件了,然后在phpmyadmin中一个一个导入。
开始时,也准备只生成一个sql文件,奈何有50多兆,试了几次,导入时总是超时,还有一次死机了,最后只好老老实实分割成2M的文件一个一个导入,大家也可以写代码自动导入。

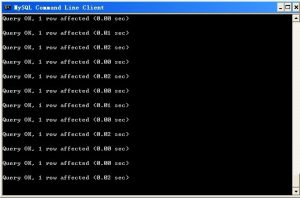
也可以到mysql命令行里用命令导入将50多兆的sql文件一次性导入:
首先输入密码进入数据库,然后use ip_data选择ip_data数据库问当前数据库,再输入source c:\ip_data.sql,导入开始,要持续一段时间,耐心等待

整个导入过称持续四十多分钟,导入数据436315条。

 ref: http://willless.com/using-pure-ip-library-to-build-mysql-ip-database.html